Acrylic pouring is an accessible art form perfect for beginners and experienced artists. Here are a few reasons why it’s worth trying:
- No Prior Experience Required: Acrylic pouring doesn’t require any previous painting experience. The process is more about letting go and enjoying the unpredictable nature of fluid acrylics. For a step-by-step guide on how to start, visit our page on how to do acrylic pouring.
- Relaxing and Therapeutic: Pouring paint and watching it flow can be incredibly relaxing and therapeutic. It can help reduce stress and promote mindfulness.
- Endless Creative Possibilities: With different pouring techniques, color combinations, and surfaces to pour on, there are infinite possibilities for creating unique artwork. Explore our articles on acrylic pouring techniques and acrylic pouring on wood for inspiration.
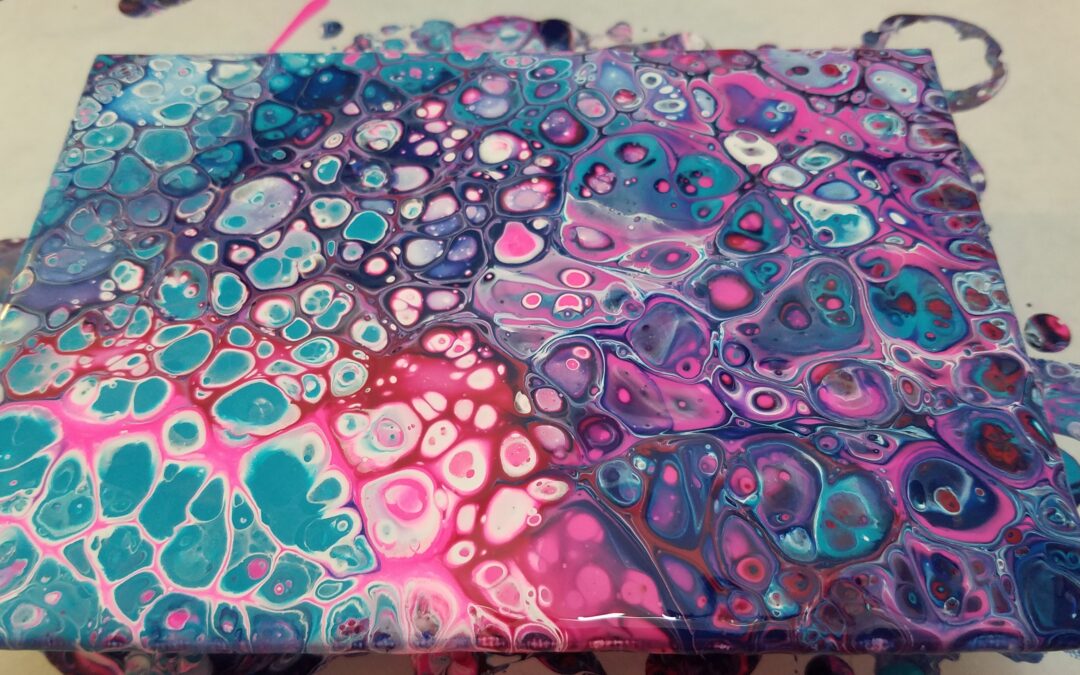
- Fun and Exciting Results: Every acrylic pour results in a one-of-a-kind artwork. The unpredictability of the process adds to the excitement and anticipation of the final result.
Embracing acrylic pouring can open up a new world of artistic expression. With the right guidance and essential acrylic pouring supplies, you can start creating your own beautiful poured paintings. Stay tuned to learn about the essential supplies needed for acrylic pouring.
Essential Acrylic Pouring Supplies
You will need some essential supplies to begin your journey in the acrylic pouring world. These core acrylic pouring supplies allow you to create stunning, abstract art pieces.
Acrylic Paints
Acrylic paints form the backbone of your acrylic pouring art. These paints come in various colors and are known for their bright pigments and ease of use. When selecting acrylic paints, it’s important to focus on quality. High-quality acrylic paints produce vibrant, long-lasting colors that are less likely to crack or fade.
However if you are just starting out, I highly recommend using cheap-o crafty acrylic craft paints. Experiment, play, have fun, find your style and formula. If you are using expensive paints, you won’t want to experiment. For white, I usually use Artist’s Loft Flow Acrylic. The other colors are great as well but I really like the white and how it develops cells in my process.
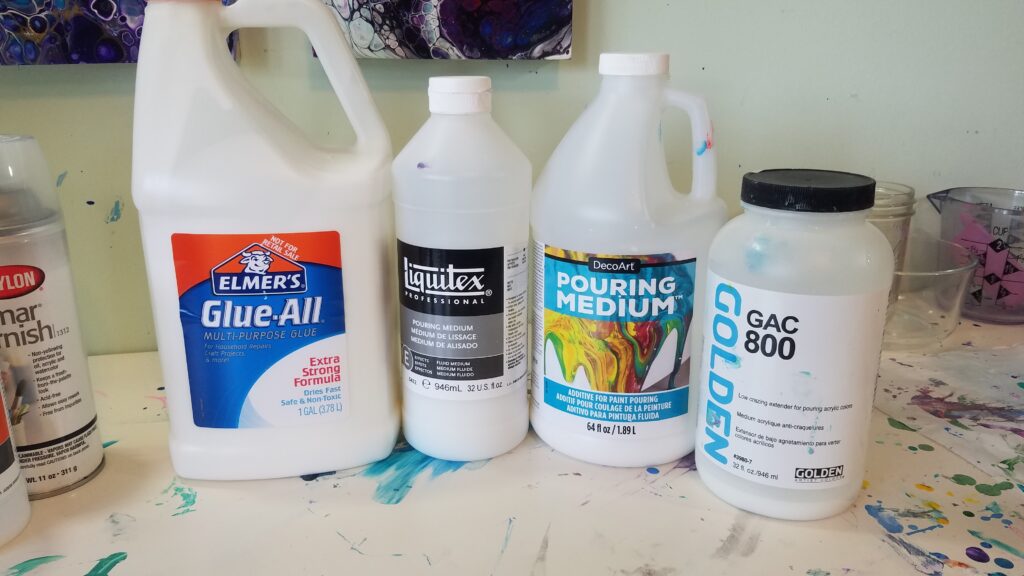
Pouring Medium
The pouring medium is a crucial component in acrylic pouring. It’s mixed with acrylic paint to flow freely across the canvas or substrate. A good pouring medium will enhance the consistency and finish of your artwork. It helps the paint to spread easily, reduces the occurrence of cracks, and enhances the formation of cells in your design.
Here are a few of my favorites:
- Elmer’s Glue ALL (not school glue)
- Floetrol
- Liquitex Pouring Medium
- DecoArt Pouring Medium
To learn more about pouring mediums, visit our guide on acrylic pouring medium.
Canvas or Substrate
The canvas or substrate serves as the foundation for your acrylic pour art. Arteza has a 12×12″ canvas pack that’s perfect for practicing. Canvases are popular, but other substrates like wood can also be used. Choose a primed canvas and ready for acrylics to save prep time.
If you’re using wood or another non-traditional substrate, ensure it’s properly sealed before pouring. Learn more about the different options in our article on acrylic pouring on canvas and acrylic pouring on wood.
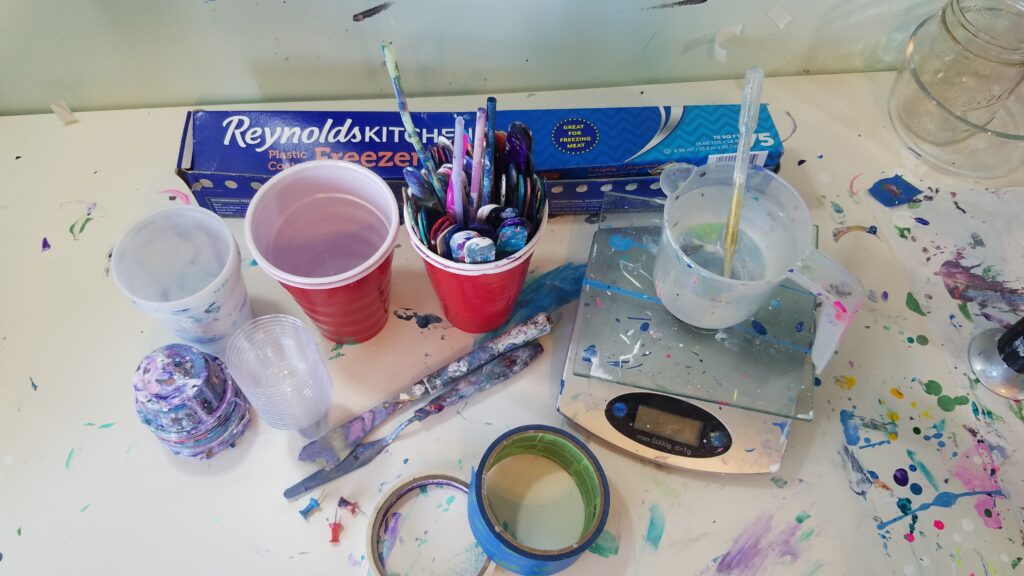
Mixing Cups and Stir Sticks
Mixing cups and craft sticks are used to combine your acrylic paints with the pouring medium. Plastic cups are a cost-effective and disposable option, while glass cups are eco-friendly and reusable. Stir sticks can be made of wood, plastic, or even old spoons. Both are essential for preparing your paint mixtures.

Gloves and Apron
Acrylic pouring can be messy, so gloves and an apron are essential to protect your skin and clothing. These items also make cleanup easier, allowing you to focus on the creative process rather than worrying about messes.
Gathering these acrylic pouring supplies is the first step in your acrylic pouring journey. Once you have your supplies, you can start experimenting with different acrylic pouring techniques and recipes to create your unique works of art.
Optional but Useful Acrylic Pouring Supplies
While several items are considered fundamental to acrylic pouring, there are additional supplies that, while optional, can enhance your acrylic pouring experience and the outcomes of your artwork. These include silicon oil, a heat gun or torch, and plastic sheeting or a drop cloth.
Silicon Oil
Silicon oil is not a must-have but can be a game-changer in the world of acrylic pouring. It creates cells in the artwork, leading to unique and eye-catching patterns. When added to the paint mixture, silicon oil rises to the surface, pushing the paint away and revealing the layers beneath. This creates the characteristic ‘cell’ structures for which acrylic pouring is known. To learn more about creating cells in acrylic pouring, visit our article on acrylic pouring cells.
Heat Gun or Torch
A heat gun or torch is another optional tool that can assist in creating cells. The heat from these tools helps to bring the silicon oil to the surface, encouraging the formation of cells. Additionally, a heat gun or torch can be used to pop any air bubbles in the paint, creating a smoother surface. It’s important to use these tools carefully to prevent overheating, which could potentially damage the artwork.
Plastic Sheeting or Drop Cloth
Acrylic pouring is a fun but messy art form. A plastic sheet or drop cloth can be incredibly useful to protect your work area. This will catch any paint that spills over the edges of your canvas, making clean-up much easier. I use freezer paper because it’s durable and I like peeling the paint off the paper once it’s dried. It’s a thing.
Whether or not you choose to use these optional supplies, they all serve to enhance the process of acrylic pouring and the quality of your final artwork.
As you continue to explore this art form, you may find these tools becoming more integral to your process. For more information about getting started with acrylic pouring, check out our guide on acrylic pouring for beginners.
Preparing Your Acrylic Pouring Supplies
Before you can create stunning acrylic pour paintings, properly preparing your acrylic pouring supplies is of utmost importance. This includes mixing your paint and pouring medium, protecting your work area, and prepping your canvas.
Mixing Your Paint and Pouring Medium
The magic of acrylic pouring lies in the unique interaction between the acrylic paint and the pouring medium. This mixture is what allows the paint to flow and create the beautiful patterns that acrylic pouring is known for.
To prepare your paint, start by choosing your desired colors. Then, mix each color with the pouring medium in a separate cup. The exact ratio of paint to pouring medium can vary, but a good starting point is a 1:1 ratio.
| Ingredients | Ratio |
|---|---|
| Acrylic Paint | 1 |
| Pouring Medium | 1 |
Stir gently until you achieve a smooth, pourable consistency. If the paint is too thick, it won’t flow properly. If it’s too thin, the colors may become muddy when mixed. For more detailed information on mixing your paint and pouring medium, check out our guide on acrylic pouring recipes.
Protecting Your Work Area
Acrylic pouring can be messy (which I love!), so it’s important to protect your work area before you begin. Lay down a plastic sheet or drop cloth to catch any drips or spills. Wearing an apron and gloves can also help protect your clothes and skin from paint.
Also, ensure that your work surface is level. This is crucial for preventing the paint from pooling unevenly on your canvas. Use a level to check the surface and make any adjustments if necessary.
Prepping Your Canvas
Whether you’re using a traditional canvas or experimenting with substrates like wood, proper preparation is key for a successful pour.
First, ensure that your canvas or substrate is clean and dust-free. If you’re using a canvas, it’s a good idea to pre-wet it with water. This helps the paint flow more easily and prevents the canvas from absorbing too much of your paint mixture.
Next, prop your canvas up on cups or a canvas rack. This allows the paint to flow off the edges and prevents it from pooling underneath the canvas. If you’re painting on a canvas, you may also want to secure the edges with painter’s tape to create clean, crisp edges.
Whether you’re a beginner or a seasoned artist, by following these steps, you’ll be well on your way to creating your own acrylic pour masterpiece. For more tips and techniques, visit our acrylic pouring for beginners guide.
Techniques and Tips for Acrylic Pouring
Once your acrylic pouring supplies are sorted, it’s time to delve into the art itself. Here, we uncover basic pouring techniques, explain how to create cells, and offer some tips for successful acrylic pouring.
Basic Acrylic Pouring Techniques
There are a handful of basic acrylic pouring techniques that beginners can try.
- Straight Pour: This involves pouring individual colors directly onto the canvas. Each color is poured one after the other, creating layers of color on the canvas.
- Dirty Pour: In this method, multiple colors are combined in one cup before being poured onto the canvas. This creates a marbled effect with colors naturally mixing and interacting.
- Flip Cup: Similar to the dirty pour, multiple colors are combined in a cup. However, the cup is then flipped upside-down onto the canvas. The cup is lifted to reveal a mixture of colors.
- Puddle Pour: This involves pouring small puddles of color onto the canvas. Each subsequent color is poured into the previous puddle, creating a radiating effect.
- Swirl Pour: In this technique, colors are layered into a cup. The cup is then slowly poured onto the canvas in a circular motion, creating a beautiful swirling effect.
- For a more detailed explanation of these techniques, check out our article on acrylic pouring techniques.
How to Create Cells in Acrylic Pouring
Cells are a desirable effect in acrylic pouring, creating a pattern that resembles cells under a microscope. They are produced when one color of paint (usually denser) sinks through another (usually lighter), creating a ‘cell-like’ effect.
To create cells, silicone oil is often added to the paint mix. When heated with a torch after pouring, the silicone rises to the surface, bringing some color with it and creating cells. For more information about creating cells, see our guide on acrylic pouring cells.
Tips for Successful Acrylic Pouring
- Choose the right pouring medium: The pouring medium is the key ingredient in acrylic pouring. It thins the acrylic paint to the right consistency for pouring without diluting the color. Read more about acrylic pouring medium here.
- Prepare your workspace: Cover it with a drop cloth or plastic sheeting to protect it. Have all your materials ready before you start.
- Mix your paints properly: Be sure to mix your paints to the right consistency. If the paint is too thick, it won’t flow properly. If it’s too thin, the colors may mix too much and become muddy.
- Experiment with different surfaces: While canvas is the most common surface for acrylic pouring, other surfaces like wood can also be used. Check out our guide on acrylic pouring on wood for more information.
- Practice, practice, practice: As with any art, practice is key in acrylic pouring. Don’t be afraid to experiment with different techniques, colors, and additives. The more you try, the more you’ll learn what works and what doesn’t.
Acrylic pouring is a fun and accessible art form. Anyone can create beautiful, abstract pieces with the right supplies and techniques. For more information on getting started, see our guide on how to do acrylic pouring.
Trackbacks/Pingbacks