While canvas is a common choice for acrylic pouring, wood adds a unique twist to this art form. Wood is a sturdy and durable surface that can handle the weight of acrylic paint without warping. It also offers a smooth, flat surface that allows the paint to flow freely, creating stunning effects.
What makes acrylic pouring on wood truly special is the ability to incorporate the natural grain and texture of the wood into the artwork. The wood grain can create an intriguing backdrop for the poured acrylic, adding depth and character to the finished piece.
Moreover, finished acrylic pours on wood can be used in various ways, from wall art to functional pieces like coasters or trays. This versatility makes acrylic pouring on wood a popular choice for artists looking to add a functional edge to their art.

In the following sections, we will delve deeper into the process of preparing your wood surface, understanding different pouring techniques, and more. Whether you’re new to acrylic pouring or looking to expand your skills, this guide will provide valuable insights into the art of acrylic pouring on wood.
Preparing for Acrylic Pouring on Wood
Before starting the exciting process of acrylic pouring on wood, there are a few initial steps to take. These include choosing the right wood surface and preparing it appropriately to ensure optimal results.

Choosing Your Wood Surface
The first step of acrylic pouring on wood is selecting the right wood surface. While it’s possible to pour on various surfaces, certain types of wood can yield better results.
- Plywood: Plywood is a good option for beginners. It is affordable, easy to find, and comes in a variety of sizes. Its smooth surface is great for acrylic pouring.
- Hardwood: Hardwood is a more expensive option, but it can produce stunning results. It is durable and less prone to warping, which makes it good for larger pieces.
- MDF (Medium Density Fibreboard): MDF is a type of engineered wood that is very smooth and even. This makes it an excellent surface for acrylic pouring.
The choice of wood largely depends on the artist’s preference, the desired aesthetics, and the budget.
Preparing Your Wood Surface
Once the right wood surface has been chosen, it’s time to prepare it for the acrylic pour.
- Sanding: Start by sanding the wood to create a smooth surface. This ensures that the paint flows easily and evenly across the wood.
- Cleaning: After sanding, clean the surface to remove any dust or particles that could interfere with the paint. A damp cloth can be used for this process.
- Sealing: Next, apply a sealant to the wood. This helps to prevent the wood from absorbing too much paint and ensures a smooth, vibrant finish.
- Priming: Finally, apply a primer to the wood. This provides a base for the paint to adhere to and can help enhance the final pour’s colors.
| Step | Materials Needed | Purpose |
|---|---|---|
| Sanding | Sandpaper | Create a smooth surface |
| Cleaning | Damp cloth | Remove dust and particles |
| Sealing | Sealant | Prevent absorption of paint |
| Priming | Primer | Provide a base for the paint |
These steps are crucial for achieving a successful acrylic pour on wood. Properly preparing the wood surface ensures the final artwork is vibrant, smooth, and long-lasting. For more tips on the acrylic pouring process, check out our articles on acrylic pouring techniques and how to do acrylic pouring.

Understanding Acrylic Pouring Techniques
The art of acrylic pouring is all about the technique. Understanding the different pouring methods can help you create various effects and make your artwork unique. Here, we’ll explore basic pouring techniques and additional methods specifically for acrylic pouring on wood.
Basic Pouring Techniques
The foundation of acrylic pouring lies in a few basic techniques. These methods can be used on any surface, including wood, and are integral to mastering this art form.
- Dirty Pour: This technique involves mixing multiple paint colors in one cup before pouring them onto the canvas or wood. The result is an unpredictable yet beautiful mix of colors.
- Flip Cup: With the flip cup, you prepare your colors in a cup, just like the dirty pour. But instead of pouring the mix, place your canvas or wood piece on top of the cup, then flip the whole thing over.
- Swirl: The swirl technique requires pouring the paints onto the surface in a circular motion. This method can create stunning spiral patterns.
- Puddle Pour: Puddle pour involves pouring individual colors onto the surface in puddles. Then, you tilt the canvas or wood to spread the paint and create a flowing effect.
For more information about these and other techniques, check out our detailed guide on acrylic pouring techniques.
Additional Techniques for Acrylic Pouring on Wood
While the basic techniques can be applied to any surface, some additional techniques can enhance the look of acrylic pouring on wood.
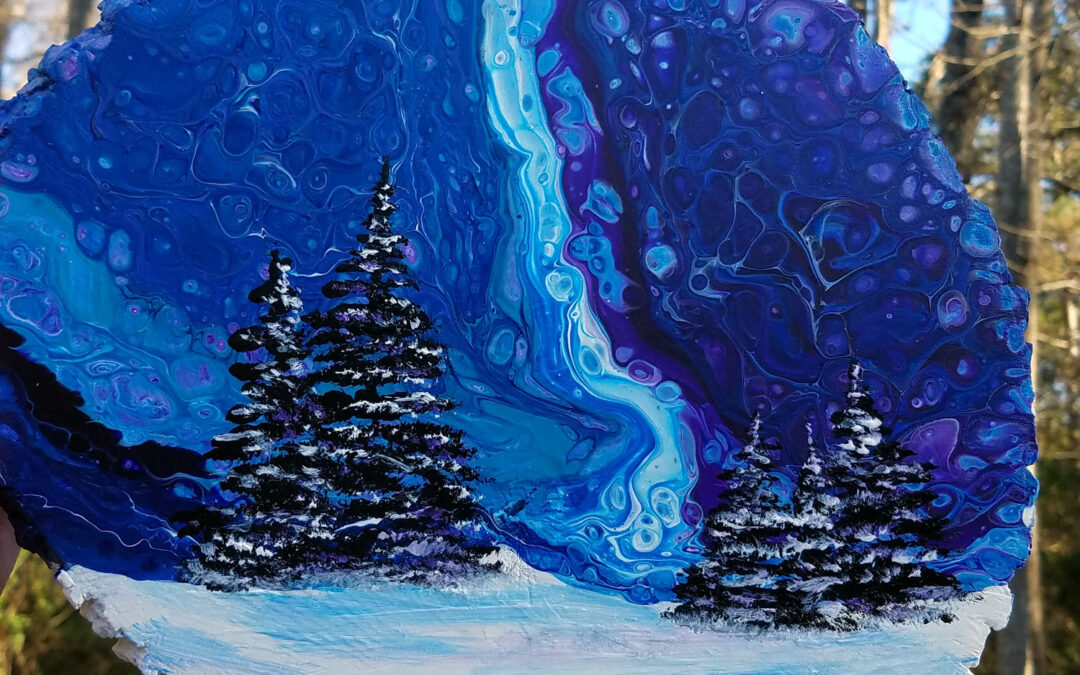
- Wood Grain Effect: This unique technique takes advantage of the natural texture of the wood. By pouring the paint in a way that follows the wood grain, you can create a stunning effect that mimics the look of natural wood.
- Resin Finish: After the paint has dried, you can apply a resin layer to your artwork. This gives it a high-gloss, protective finish that enhances the colors and makes them pop.
- Negative Space: This involves leaving some areas of the wood unpainted, allowing the natural wood to become part of the artwork.
Remember, the key to mastering acrylic pouring is experimenting with different techniques and finding what works best for you. For more guidance on starting this art form, check out our article on acrylic pouring for beginners.
The Process of Acrylic Pouring on Wood
Delving into the actual process of acrylic pouring on wood, this journey comprises three primary steps: mixing your paints, applying your paints, and finishing your artwork. Each step plays an integral role in creating a stunning piece of art.
Mixing Your Paints
The first step in the acrylic pouring on wood process is to mix your paints. For this, you need acrylic paint, a pouring medium, and, optionally, silicone oil to create cells. The pouring medium helps the paint flow better and improves its consistency, while the silicone oil contributes to the formation of cells, adding depth and complexity to your artwork. Learn more about acrylic pouring medium and acrylic pouring cells on our site.
The typical ratio for mixing is:
| Component | Ratio |
|---|---|
| Acrylic Paint | 1 part |
| Pouring Medium | 2 parts |
| Silicone Oil | 2-3 drops |
Make sure to mix your paints thoroughly until you achieve a smooth, flowing consistency.
Applying Your Paints
Once your paints are ready, it’s time to apply them to the wood surface. You can do this using different techniques such as dirty pour, flip cup, or puddle pour. Each technique provides a unique look, so choose one that aligns with your artistic vision. For a detailed guide on these methods, check out our article on acrylic pouring techniques.
After pouring the paint, tilt the wood panel gently in different directions to spread the paint across the surface. The goal is to cover the entire surface while creating interesting patterns and designs.

Finishing Your Artwork
The final step in the acrylic pouring on wood process is to finish your artwork. Allow the paint to dry completely, which can take anywhere from 24 hours to a few days, depending on the thickness of the paint and the temperature and humidity of your workspace.
Once dry, apply a sealant to protect your artwork and enhance its appearance. The sealant also adds a layer of protection from dust, UV rays, and minor scratches. You can choose from different finishes, such as gloss, satin, or matte based on your preference.
Remember that the process of acrylic pouring on wood is as much about the journey as it is about the destination. Don’t be discouraged if your first few attempts look unexpected. With patience, practice, and creativity, you’ll soon master the art of acrylic pouring on wood. For more guidance and inspiration, visit our comprehensive guide on acrylic pouring for beginners.
Tips and Troubleshooting
Acrylic pouring on wood can be a rewarding and enjoyable experience. However, as with any art form, it comes with its own set of challenges and potential mistakes. In this section, we’ll explore some common mistakes and how to avoid them, tips for maintaining your artwork, and safety guidelines for working with acrylic paints.
Common Mistakes and How to Avoid Them
When it comes to acrylic pouring on wood, it’s easy to make mistakes, especially if you’re a beginner. Here are some of the most common issues and how to avoid them:
- Surface not adequately prepared: Wood is a porous surface that must be sealed before pouring. If not, the paint will seep into the wood, creating uneven colors and textures. To avoid this, always prime your wood with a sealer or gesso before you start.
- Paint consistency is off: Getting the right consistency for your paint is crucial for successful pouring. If the paint is too thick, it won’t flow properly; if it’s too thin, it won’t hold its shape. Always test the paint consistency before you start pouring. If you’re unsure how to achieve consistency, check out our guide on acrylic pouring recipes.
- Not using the right materials: Not all paints and mediums suit acrylic pouring. Ensure you use fluid acrylic or acrylics with a pouring medium to achieve the best results. For more information, read our article on acrylic pouring supplies.
| Common Mistakes | Solutions |
|---|---|
| Surface not properly prepared | Seal the wood before pouring |
| Paint consistency is off | Test the paint consistency before pouring |
| Not using the right materials | Use fluid acrylics and a pouring medium |
Maintaining Your Artwork
Once you’ve completed your acrylic pour on wood, it’s important to take steps to protect and preserve your artwork. Here are a few tips:
- Seal your artwork: Once the paint has completely dried, apply a sealant to protect the artwork from dust, UV rays, and moisture.
- Avoid direct sunlight: Keep your artwork out of direct sunlight to prevent fading and discoloration.
- Clean with a soft cloth: To clean your artwork, gently dust it with a soft, dry cloth. Never use wet wipes or cleaning solutions as they can damage the paint.
Safety Tips for Acrylic Pouring on Wood
While acrylic pouring is generally safe, taking some precautions is important, especially when working with paints and mediums.
- Ventilation: Ensure your workspace is well-ventilated to avoid inhaling any fumes from the paint or medium.
- Protection: Wear gloves and an apron to protect your skin and clothing from paint splashes.
- Dispose of materials properly: Don’t pour leftover paint down the drain. Instead, let it dry out and dispose of it in the trash.
Keeping these tips and safety guidelines in mind can ensure a successful and enjoyable experience with acrylic pouring on wood. If you’re new to this technique, don’t forget to check out our guide on acrylic pouring for beginners.
Trackbacks/Pingbacks